Teach Me How to Hobby: Going Out On a Loom
Ever wanted to learn how to knit? Watch these helpful step by step videos and instructions on how to knit a washcloth and a hat!
December 18, 2018
While knitting may seem like a hobby for grandparents, it is accessible to all ages and opens outlets to creativity, stress relief and patience. Millions around the world knit a variety of things including hats, blankets, scarfs, socks, towels and so much more.
With endless patterns and yarn to pick from, knitting is unique to each person allowing for unlimited, handmade items. It is a lifelong skill that can come in handy in multiple ways.
Although starting up a new task may seem daunting, a student here at Liberty shares how they first started.
Sydney Nunnally, sophomore, learned to knit from a young age. At just ten years old, Nunnally’s sister taught her how to knit after they found crocheting to be too hard.
“I like to knit scarves just because they are really easy. [I like knitting] because it helps my stress and reminds me to just relax,” said Nunnally.
Knitting is portable and can be easily taken on the go since it involves only needles and yarn. It’s even a great hobby to learn while recovering from a surgery or while sick since it requires very little movement. Additionally, it can improve hand eye coordination and perseverance because of its repetitive, yet difficult at first, technique.
With so many different options of what to knit, it can provide a variety of thoughtful gift ideas for family members or friends. Although the price of yarn can start to add up, it can be found in almost every store, where low prices are bound to be found.
If up for the task, follow these step by step instructions with videos on how to knit a washcloth with knitting needles and a hat with a loom.
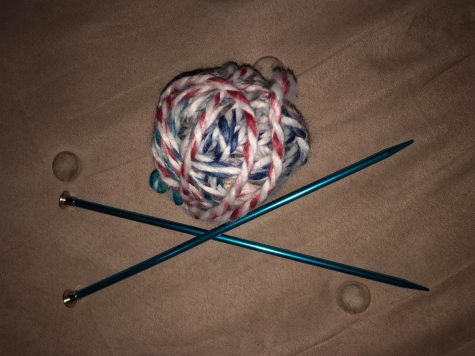
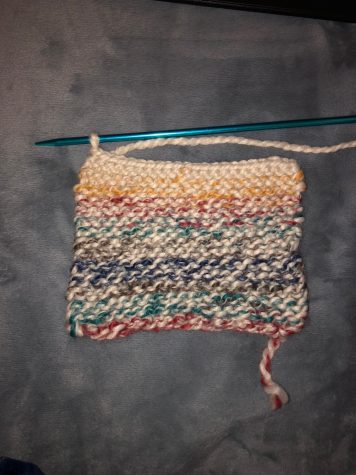
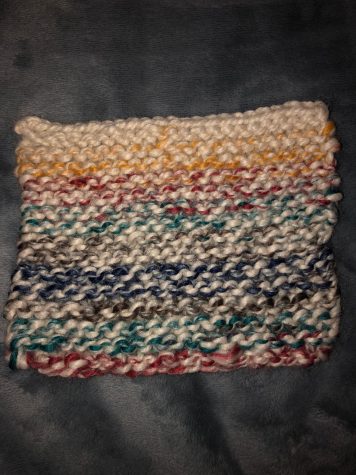
WASHCLOTH
Materials:
- Knitting needles (any size will work just make sure if you have thick needles to use thick yarn and vice versa)
- Yarn
- Perseverance!
Step by Step Instructions:
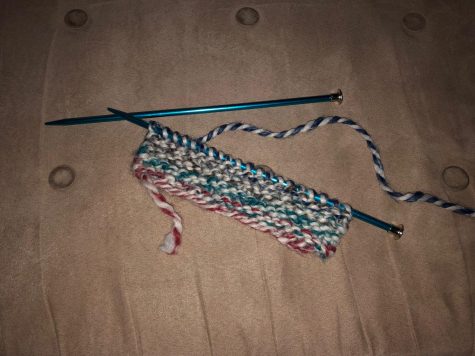
1. Tie a slip knot onto one of the knitting needles: Start by making a loop with the yarn, bring the yarn through the loop, creating another loop with a knot at the end
2. To start casting on about 15- 20 stitches, slide the slip knot onto one needle and pull the yarn to tighten the knot
3. Wrap the working yarn (yarn connected to the ball of yarn) around your thumb so you have a loop around your thumb.
4. Bring the needle under and up through the loop around your thumb
5. Remove your thumb from the loop and pull the yarn
6. Continue from step 2 until you have desired number of stitches cast on
7. Hold the needle with the stitches in your left hand
8. Hold the other needle with nothing on it in you right hand
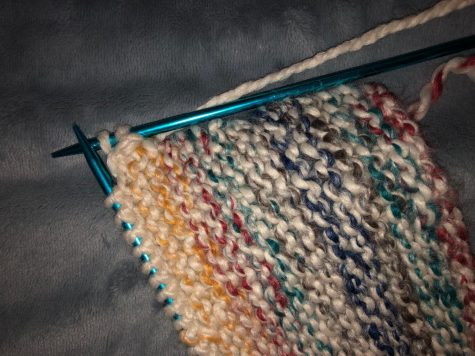
9. Take the needle in your right hand and insert it under the front of the first loop (one closest to the needle point) and push it through so the right needle sits behind the left needle
10. Have the working yarn (one attached to yarn ball) lay in the back of the needles
11. Take the working yarn and wrap it around the right needle, counter clockwise, so that it sits between the two needles. (Wrap yarn from front to back)
12. When looking between the two needles, there should be two holes created by the middle yarn. Maneuver the right needle up and down to position it over the left hole.
13. Poke the right needle through the left hole to the front of the left needle. (Be careful so the loop does not slip off the needle).
14. Take the new stitch (on the right needle) and pull it off of the left needle, transferring the stitch from the right to the left needle.
15. Repeat steps 9-14 until you have transferred all of the stitches on your left needle to the right needle.
16. Now switch the needles, holding the needle with the yarn on it again in your left hand and the needle with nothing on it in your right hand.
17. Now start the process again, repeating steps 9-16
18. Continue to do this until you have reached a desired length. (For a washcloth do about 6 inches long).
Casting off:
1. Knit two stitches onto the other needle
2. Insert your left needle into the first stitch on your right needle. (Rightmost stitch)
3. Lift the first stitch over the second stitch
4. Pull out the left needle, leaving the combined stitch on the right needle.
5. Knit another stitch to create another two stitches on the right needle and repeat processes b-d until only one stitch remains on the right needle
6. Slip the needle out from the loop, still keeping the loop intact
7. Cut the yarn leaving a 6 inch end
8. Put the cut end through the loop and pull it tight
9. Cut off excess or weave it in to your washcloth
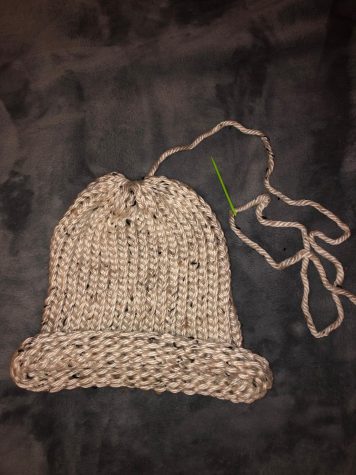
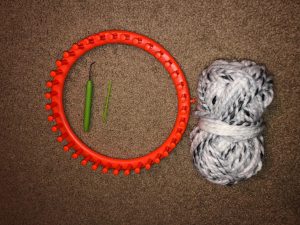
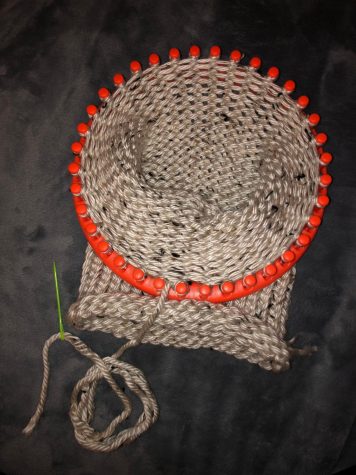
HAT
Materials:
- A Circular Loom
- Knitting Hook
- Large Sewing Needle
- Yarn
Step by Step Instructions:
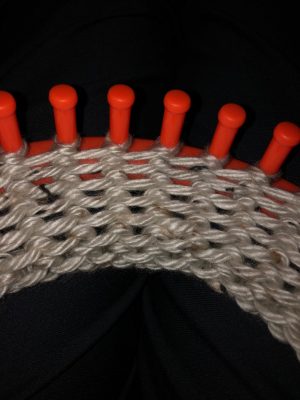
1. Tie a knot around the knob on the loom
2. Start going around the loom, wrapping the yarn around each peg
3. After finishing going around the entire loom, push the yarn to the bottom of each peg
4. Start wrapping the yarn around each peg to create two levels
5. Wrap the end of the yarn around the knob to keep it from coming undone while you do the next step
6. Take your tool (little hook needle or you fingers) and pull the bottom row over the top row to the inside of the loom
7. Repeat this step for each peg until you have gone all the way around
8. You should be left with one row at the top of each peg on your loom
9. Now push down the yarn to the bottom of the loom and repeat steps 4-8
10. When you have finished about 4-5 rows, untie the knot around the knob of the loom and tighten the knot
11. Once you have gotten to your desired length of your hat follow the steps to get your hat off of the loom

How to Finish Off a Hat:
1.Cut off about 18 inches of extra yarn
2. Put the yarn end through a plastic or metal sewing needle
3. Take the needle with the yarn and thread it under the row of yarn on the first peg, lifting the row off of the loom
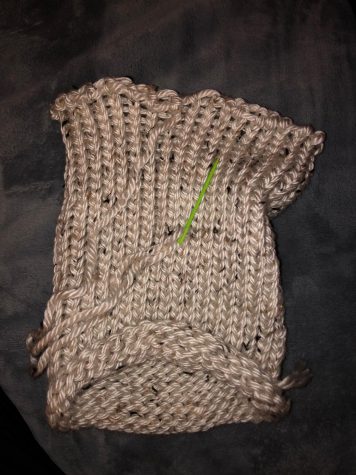
4. Continue doing this to the rest of the stitches on the loom until the hat is off of the loom
5. Pull the excess string to close the top of the hat
6. Tie a slip knot to finish off the hat and tuck into the inside